| CONTACT US | FAQ'S | ||||||||||
 |
 |
 |
 |
 |
 |
 |
 |
 |
 |
|
|
|||||||||||||||||||||||||||||||||
|
|
|
|
|

|
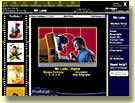
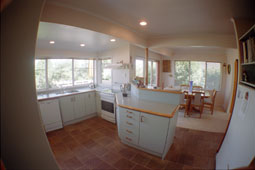
You might say that Photoshop has a free transform tool, well, it doesn't work like this program, and neither does the perspective tool plug-in from Andromeda. As most people probably like to do with a new program, install and run it...Installation was dead easy and fast, thus I nose dived into the "Grasshopper" plug in (yes, that is how it is called) under filters when I opened up Photoshop. Just what you do not do, after several tries it just would not give me a completed image, grrrrrrrrrr. You have to, yes you must, READ the tutorial file first. It is such a simple image window that you think you can not go wrong but your first move is the most important move and the rest is easy peazy, but you must practice with the tutorial first. If you encounter a file that is not compatible with the "grasshopper" plug in, the drop down box under filters of "grasshopper" will be greyed out - like when working with raw files, but most widely used files like all tiff, psd and jpeg files etc. are compatible. So far so good, I have an image open in the image preview box of ImageAlign. A grid field over the preview image provides many clues as how far you want to correct. Since the image in the centre, the real mid centre, has no distortion you start making your adjustments from the centre. I assume that all computations that the software program uses is based on that optical centre. Thus scanned photos that were machine printed and cropped a little will not show their true optical centre since the left or right, bottom or top, have been cropped off. This might lead to minute problems to get things exactly straight. The true uncropped digital files from your digital camera are the most accurate to work with. I wanted to work on an image taken by a 15mm fish eye lens, a negative and photo were scanned by Hans from Digital Image in Auckland. This man is an expert in this field, Hans has the latest scanning gear and fantastic skills and made sure I had some excellent clean and color corrected scans to start this test with. Ok, with the files now in my PC I first created a level horizon, from here it is easier to see how much the verticals are leaning in. An extended cross hair cursor shows how far you have to adjust. The beauty of this program is that it uses individual mouse clicks to move the image, this makes for very accurate imaging. An alternative is a slider, this is a bit jumpy and creates enormous adjustments if you are not careful. You go through all the corrections and work out how far you like to take them. Redo, go back, none of these actions will deteriorate your image, you are working on a small preview image...When you have finished you have in your preview image the corrected image with bits of white around it. The exciting bit now is the rescale slider, this is the last tool you use before you save your image. Traditionally "photoshoppers" use zoom only to see a magnified part of the image. Well, this seems to do the same thing, the image gets bigger until it fits the image preview window. The trick is to "rescale" in after your corrections until all the white bits around your photos have disappeared. Some part of your image will flow over the edge and will be cropped off. Of course this depends on the amount of corrections. Most mild cases of corrections will not suffer that fate. The REAL zoom tool sits under the preview image window, indicated by plus % sign up to 6400% or a minus sign to change the magnification. This makes it easy to see the corrections of the preview image, a grabberhand will move it to see detail where you need it. I like to call the rescale slider more like a "compute" button as it will create your final look of the image before the image is actually "rendered" when you click the OK button. The image that you work on during this progress is not manipulated, you can go backwards or forwards, do silly things, it is not changing your image in any way or eating up memory etc. Only when the OK button is hammered down with a final grin on your face it will rebuild your corrected image and give you the same pixels back you started with...clever? Fantastic! Then save it as any file you like in Photoshop.
You do not need to buy expensive shift lenses or lovely view cameras, sigh, anymore. Just take your photos, scan the negative or transparency for best results, photos are ok but will not be the optimum option! The creative user will find some fun here too, you can make normal scenes into wide angle or find some other distortions...because this program bends all the rules and straightens out the truth. Conclusion: If you ever felt disappointed because you had to decline some assignments because you did not have a shift lens, view camera or were in a spot that only allowed a wide angle lens (contrary to the wishes of the client who does not want any distortion visible) to do the job, this software program pays itself back handsomely. ImageAlign software can be found at www.ImageAlign.com. You can download a fully functional demo for 20 trial corrections, after that the images will be watermarked. Viewing you next time with more!
. |
||||||||||||||||||||
| Questions, Comments? Look
here: The
help section Broken link(s)? Email us at: Testimonials. Visitor/Member Comments: News about us! |
FREE SCHOOL INFO
Select "Photography" under
Program of Study to see
Photo Schools
|
|
|
|
profotos.com: HELP | ADVERTISING INFO | CONTACT US | SITE MAP | FAQ's | ABOUT US Copyright ©1999-2011 Profotos.com (an independently owned company). All rights reserved. Terms of Use and Privacy Policy and Safety Information are applicable to this site. Our Address: Profotos.com, 681 Inverness Drive, Fairborn, OH 45324 USA Contact us via telephone: 937-660-0845 |


 Robert van de
Voort is a professional photographer and writer, with his headquarters
located on the North Island of New Zealand. Robert's professional
photographic career spans the course of over 20 years, with work
in stock, advertising, studio, digital photography and much more!
You can learn more about Robert and see examples of his stunning
work by visiting his website at
Robert van de
Voort is a professional photographer and writer, with his headquarters
located on the North Island of New Zealand. Robert's professional
photographic career spans the course of over 20 years, with work
in stock, advertising, studio, digital photography and much more!
You can learn more about Robert and see examples of his stunning
work by visiting his website at